
Implementing an authentication system is a crucial step in web applications development to protect and secure your API. Creating your personalized approach that allows you to store your users’ information in your database is always better than using a ready-to-use solution implemented automatically.
This tutorial will teach you how to build a complete Node.js Login, Registration, and user management RESTful API using MySQL. For that, we will use node.js to develop our server and MySQL to store users and handle sessions.
If you are not familiar with sessions, you can follow the link: How to store Session in MySQL Database using express-mysql-session; this explains everything about sessions and express-mysql-session module with an interesting practical example.
Related Articles:
- Best practices for optimizing MySQL database performance.
- How to add Custom Error Handler Middleware to your Node.js/Express API.
- Node.js + MySQL : Add Forgot/Reset Password to Login-Authentication System.
- Complete JWT Authentication and Authorization System for MySQL/Node.js API.
- How to Build a Complete API for User Login and Authentication using MySQL and Node.js.
- How to store Session in MySQL Database using express-mysql-session.
- Automating Your MySQL Database with Triggers.
- How to use ON DELETE CASCADE in MySQL.
- MySQL + Event Scheduler: How to delete data from MYSQL table using Event Scheduler.
- Using MySQL Event Scheduler: A Complete Guide.
This article will cover:
- Create our MySQL database and the User Table
- Developing the application in node.js
- Configuring the connection to the database
- Storing Sessions in MySQL database
- Developing the application
- Sign up route
- Login Route
- How to hash a password in Node.js
- Home page route
- Logout route
- How to add validate request middleware
- Conclusion
- You might also like:
Note: In the rest of this article:
- We assume that you have already set up MySQL on your computer and added it to your path. If not, you can use the following links:
Create our MySQL database and the User Table
In this tutorial, we will store our users’ data information in a MySQL database named “db” with one table named “User“. We used the following schema to create a User table :
Table: User
Columns:
| id | int AI PK |
| first_name | varchar(45) |
| last_name | varchar(45) |
| varchar(100) | |
| password | varchar(250) |
If you want to know how to create a database using node.js, click here: How to create MySQL database using node.js.
Developing the application in node.js
Now that our database and the User table are created let’s create our project in Node.js. We are starting with a boilerplate node.js server. If you want to know more details about the start-server we are using in this article, go ahead and check this article: Complete Guide to Build a RESTful API with Node.js and Express.
To use MySQL with Node.js, you need to install mysql Node.js module.
npm install --save mysql
The following code imports the npm module into our API:
const mysql = require('mysql');
Configuring the connection to the database
We are using a connection pool to connect our database. A connection pool can manage multiple connections, which will help us and ease the asynchronous interaction with the database. If you want to know more about connection pooling and how it works, check this article: Why is Connection Pooling better than Single Connection?.
And for more detail bout the connection pooling configuration, click on this link: Complete Guide to Build a RESTful API with Node.js and Express.
server.js
const express= require('express');
require("dotenv").config();
const bodyParser = require('body-parser');
const cors=require("cors");
const mysql = require('mysql');


const PORT= process.env.APP_PORT;


const options ={
    connectionLimit: 10,
    password: process.env.DB_PASS,
    user: process.env.DB_USER,
    database: process.env.MYSQL_DB,
    host: process.env.DB_HOST,
    port: process.env.DB_PORT,
    createDatabaseTable: true

}

const pool = mysql.createPool(options);


const app=express();

app.use(cors());

app.use(bodyParser.urlencoded({
    extended: true
}));

app.use(bodyParser.json())


app.listen(PORT, ()=>{console.log(`server is listening on ${PORT}`)});
–> Remember to permanently save all the environment variables related to your app in your .env file, so you will load and use them later. To see how to create this file, go Here.
.env
APP_PORT = 3000
DB_PORT = 3306
DB_HOST = localhost
DB_USER = root
DB_PASS =  'enter your database password'
MYSQL_DB = db
Storing Sessions in MySQL database
To manage users’ sessions, we will store them in our database instead of saving them in the express server (MemoryStore by default). To know why storing sessions in a database is a good solution for handling sessions, read this section: Why storing sessions in a Database?
To store our sessions in MySQL, we need to install and then import two additional dependencies: express-session and express-mysql-session, to create the mysqlStore.
 npm  install --save express-session

 npm install --save  express-mysql-session
The next step is to set up the session middleware on our server.js.
To learn more about Mysql session store and how to set up the session middleware, check this section: Setting up the express-session object.
server.js
const express= require('express');
require("dotenv").config();
const bodyParser = require('body-parser');
const cors=require("cors");
const mysql = require('mysql');
const session = require('express-session');

const mysqlStore = require('express-mysql-session')(session);


const PORT= process.env.APP_PORT;
const IN_PROD = process.env.NODE_ENV === 'production'
const TWO_HOURS = 1000 * 60 * 60 * 2

const options ={
    connectionLimit: 10,
    password: process.env.DB_PASS,
    user: process.env.DB_USER,
    database: process.env.MYSQL_DB,
    host: process.env.DB_HOST,
    port: process.env.DB_PORT,
    createDatabaseTable: true

}

const pool = mysql.createPool(options);


 const  sessionStore = new mysqlStore(options, pool);


const app=express();

app.use(cors());

app.use(bodyParser.urlencoded({
    extended: true
}));

app.use(bodyParser.json())


app.use(session({
    name: process.env.SESS_NAME,
    resave: false,
    saveUninitialized: false,
    store: sessionStore,
    secret: process.env.SESS_SECRET,
    cookie: {
        maxAge: TWO_HOURS,
        sameSite: true,
        secure: IN_PROD
    }
}))


app.listen(PORT, ()=>{console.log(`server is listening on ${PORT}`)});
.env
APP_PORT = 3000
DB_PORT = 3306
DB_HOST = localhost
DB_USER = root
DB_PASS =  'enter your database password'
MYSQL_DB = db


SESS_LIFETIME = TWO_HOURS
NODE_ENV = 'production' /change it to development if you are in development environment
SESS_NAME = 'enter_the_session_name'
SESS_SECRET = 'yoursecret'
Developing the application
We assume that you have your API boilerplate ready to start. If not, you can check here how to do it. Inside the project folder, create a new file db.js where you will write your queries after importing mysql module by adding this line of code to db.js:
const mysql =require(‘mysql’)
Once the db.js file is created, we can write the queries that we need in our routes implementation later. For that, you will write all these queries as methods of the db object in your db.js. For more details, check:
Complete Guide to Build a RESTful API with Node.js and Express.
How to interact with MySQL database using async/await promises in node.js ?
db.js
const mysql = require('mysql');


const pool = mysql.createPool({
    connectionLimit: 10,
    password: process.env.DB_PASS,
    user: process.env.DB_USER,
    database: process.env.MYSQL_DB,
    host: process.env.DB_HOST,
    port: process.env.DB_PORT

});


let db = {};


db.getUser = (id) =>{
    return new Promise((resolve, reject)=>{
        pool.query('SELECT * FROM User WHERE id= ?', [id], (error, user)=>{
            if(error){
                return reject(error);
            }
            return resolve(user);
        });
    });
};


db.getUserByEmail = (email) =>{
    return new Promise((resolve, reject)=>{
        pool.query('SELECT * FROM User WHERE email = ?', [email], (error, users)=>{
            if(error){
                return reject(error);
            }
            return resolve(users[0]);
        });
    });
};


db.insertUser = (firstName, lastName, email, password) =>{
    return new Promise((resolve, reject)=>{
        pool.query('INSERT INTO User (first_name, last_name, email, password) VALUES (?, ?, ?, ?)', [firstName, lastName, email, password], (error, result)=>{
            if(error){
                return reject(error);
            }

              return resolve(result.insertId);
        });
    });
};


module.exports = db;
We used promises instead of callback functions in our queries because it makes coding easier when using async/await to write our routes. For more details about async/await functions and promises, go here: How to interact with MySQL database using async/await promises in node.js ?.
The next step is to pull in the db object from db.js by adding this line of code to the server.js file:
const db = require('./db');
Now that we have our database requests ready to use, let s define the registration, login, and logout routes in the server.js of our Node.js and MySQL boilerplate API.
Sign up route
First, we need to create the Main page where the user can choose between registration or login in case he is registered already. To make things easy for you, we are just adding a simple get route to our app to load a simple HTML code.
In this get route, we will first check if there is an open session by getting the user ID from the request session object. If the userId exists, we redirect the user to the home page; otherwise, the user will be redirected to the Main page to sign up or log in.
app.get('/', (req, res)=>{
    const { userId } = req.session
    console.log(userId);
    res.send(`
    <h1> Welcome!</h1>
    ${userId ?`<a href = '/home'> Home </a>
    <form method='post' action='/logout'>
    <button>Logout</button>
    </form>` : `<a href = '/login'> Login </a>
    <a href = '/register'> Register </a>
`}
    `)
})
Sign up is a very common process of any web application that has a user management system. This step helps to register users and store their data in the database.
To log into the app, a user needs first to register by entering his first name, last name, email, and password in the registration form on the register page. After that, we need to store this information in the User table.
First, we need to create a get route to load the HTML code of the registration form.
app.get('/register', (req,res)=>{
    res.send(`
    <h1>Register</h1>
    <form method='post' action='/Register'>
    <input type='text' name='firstName' placeholder='First Name' required />
    <input type='text' name='lastName' placeholder='Last Name' required />
    <input type='email' name='email' placeholder='Email' required />
    <input type='password' name='password' placeholder='password' required/>
    <input type='submit' />
    </form>
    <a href='/login'>Login</a>
    `)
})
The next step is to create a post request to save the registration form data into our database. Inside these routes, we get all the registration form data from the request object, then check if they are not null.
If all the data needed is present, we can continue and register the user using the inserUser request method defined in the db.js file. Then redirect him to the Main page or the registration page where he can log in. Otherwise, we send an error message or whatever action you want to take in this case.
app.post('/register',  async (req, res, next)=>{
    try{
        const firstName = req.body.firstName;
        const lastName = req.body.lastName;
        const email = req.body.email;
        let password = req.body.password;


              if (!firstName || !lastName || !email || !password) {
                return res.sendStatus(400);
             }


        const user =  await db.insertUser(firstName, lastName, email, password).then(insertId=>{return db.getUser(insertId);});
        req.session.userId = user.id
            return res.redirect('/register')

    } catch(e){
        console.log(e);
        res.sendStatus(400);
    }
});
Login Route
When the user clicks on the Login button on the Main page or the Register page, he will be sent to the login page to enter his email and password.
The login page has the user interface defined in the following get route.
 app.get('/login', (req,res)=>{
    res.send(`
    <h1>Login</h1>
    <form method='post' action='/login'>
    <input type='email' name='email' placeholder='Email' required />
    <input type='password' name='password' placeholder='password' required/>
    <input type='submit' />
    </form>
    <a href='/register'>Register</a>
    `)
})
Our user authentication system will take as inputs email and password from the login form and post data to the node server. If the user matches, we will redirect the user to the Home page; otherwise, send him to the login page with an error message.
Now we are going to create the route that will post a request to authenticate the user by matching email and password from the login form and those that we got from the User table in the database using getUserByEmail request method defined in the db.js file, by following these steps to validate user:
- First, get the email and password from the request object.
- Then verify if there is a matching user with the same email existing in our database.
- Finally, if the email and the password are validated, the sessions database table should be automatically created when using default options, which means setting the createDatabaseTable option to TRUE. If the table is not created for whatever reason, you can use the following schema to create it.
CREATE TABLE IF NOT EXISTS `sessions` (
  `session_id` varchar(128) COLLATE utf8mb4_bin NOT NULL,
  `expires` int(11) unsigned NOT NULL,
  `data` mediumtext COLLATE utf8mb4_bin,
  PRIMARY KEY (`session_id`)
) ENGINE=InnoDB
- Click HERE if you need help on how to create MySQL database and tables using node.js.
- A session will be valid until maxAge time expires or the user logs out. In both cases, the session will be automatically removed from the session table.
Note: The session ID is sent to the client, and it is saved as a cookie. This cookie will be sent with each user’s request to the server.
 app.post('/login', async(req, res, next)=>{
    try{
    const email = req.body.email;
    let password = req.body.password;
    user = await db.getUserByEmail(email);

    if(!user){
        return res.send({
            message: "Invalid email"
        })
    }

    if(user.password !== password){
        return res.send({
            message: "Invalid  password"
        })

    }

        req.session.userId = user.id
        return res.redirect('/home');


    } catch(e){
        console.log(e);
    }
});
How to hash a password in Node.js
For security reasons, we must hash and verify passwords before saving them in the database. We are using the bcrypt module to generate a password hash and store it in the database and later verify it during the login process.
To install this library, use the following command line :
npm install --save bcryptThen inside your server.js, import the following functions from bcrypt module:
const { hashSync, genSaltSync, compareSync } = require("bcrypt");
This code hashes the password ‘password’ using bcrypt and stores the result in the ‘password’ variable. We will use hashing code in the sign-up route to hash the password before saving it to the database.
   const salt = genSaltSync(10);
   password = hashSync(password, salt);
To verify the password ‘password’ given by the user in the login form against the password hash stored in the database, we use the compreSync() function of the bcrypt module. We save the result in the isValidPassword variable, and we will use it in our login route.
const isValidPassword = compareSync(password, obj.password);
After adding the Hash and Verify Passwords code with Bcrypt, our login and sign up routes, look like this:
Sign up route after hashing password
app.post('/register', async (req, res, next)=>{
    try{
        const firstName = req.body.firstName;
        const lastName = req.body.lastName;
        const email = req.body.email;
        let password = req.body.password;


              if (!firstName || !lastName || !email || !password) {
                return res.sendStatus(400);
             }

             const salt = genSaltSync(10);
             password = hashSync(password, salt);


        const user =  await db.insertUser(firstName, lastName, email, password).then(insertId=>{return db.getUser(insertId);});
        req.session.userId = user.id
            return res.redirect('/register')

    } catch(e){
        console.log(e);
        res.sendStatus(400);
    }
});


app.post('/logout', redirectLogin, (req, res)=>{
    req.session.destroy(err => {
        if(err){
            return res.redirect('/home')
        }
        sessionStore.close()
        res.clearCookie(process.env.SESS_NAME)
        res.redirect('/login')
    })

})
Login Route After verify a password against a hash:
 app.post('/login', async(req, res, next)=>{
    try{
    const email = req.body.email;
    let password = req.body.password;
    user = await db.getUserByEmail(email);

    if(!user){
        return res.send({
            message: "Invalid email or password"
        })
    }

    const isValidPassword = compareSync(password, user.password);
    if(isValidPassword){
        user.password = undefined;
        req.session.userId = user.id
        return res.redirect('/home');
    }  else{
         res.send(
             "Invalid email or password"
        );
        return res.redirect('/login')
    }

    } catch(e){
        console.log(e);
    }
});
Home page route
The home page in our app is the dashboard page, where the user is redirected after a valid authentication. Every time the user visits the home page, the cookie is sent back to the server to check if the session table has a session with the same ID. If yes, the home page loads without redirection to the login page.
 app.get('/home',  async(req,res)=>{
    const {userId} =req.session
     if(userId){
    try{
        const user = await db.getUser(userId);
        console.log(user)
        req.user = user;
        res.send(`
        <h1>Home</h1>
        <a href='/'>Main</a>
        <ul>
        <li> Name: ${user[0].first_name} </li>
        <li> Email:${user[0].email} </li>
        </ul>

        `)

    } catch(e) {
        console.log(e);
        res.sendStatus(404);
    }
}

})
Logout route
This last route is used for logging out the user by destroying the session and removing it from the session table in the database, then redirecting the user to the login page.
 app.post('/logout', (req, res)=>{
    req.session.destroy(err => {
        if(err){
            return res.redirect('/home')
        }
        sessionStore.close()
        res.clearCookie(process.env.SESS_NAME)
        res.redirect('/login')
    })

})
How to add validate request middleware
As we said, the home page in our app is the dashboard page, and the user can access this page only after a valid authentication or if a previous session steals open.
To control the user access to different pages, we will define two validation functions or middleware functions and add them to our routes:
- The first one redirectHome() will redirect the user to the home page in case a session is open.
- The second redirectLogin() one will redirect the user to the login page if no session is available.
 const redirectLogin = (req, res, next) =>{
    if(!req.session.userId){
        res.redirect('/login')
    }else{
            next()
        }
 }


 const redirectHome = (req, res, next) =>{
    if(req.session.userId){
        res.redirect('/home')
    }else{
            next()
        }
 }
Our final code after adding the middleware functions to our routes:
server.js
 const express= require('express');
require("dotenv").config();
const session = require('express-session');
const bodyParser = require('body-parser');
const mysql = require('mysql');
const db = require('./db');
const { hashSync, genSaltSync, compareSync } = require("bcrypt");

const mysqlStore = require('express-mysql-session')(session);


const PORT= process.env.APP_PORT;
const IN_PROD = process.env.NODE_ENV === 'production'
const TWO_HOURS = 1000 * 60 * 60 * 2

const options ={
    connectionLimit: 10,
    password: process.env.DB_PASS,
    user: process.env.DB_USER,
    database: process.env.MYSQL_DB,
    host: process.env.DB_HOST,
    port: process.env.DB_PORT,
    createDatabaseTable: true


}
const pool = mysql.createPool(options);


const  sessionStore = new mysqlStore(options, pool);


const app=express();


app.use(bodyParser.urlencoded({
    extended: true
}));

app.use(bodyParser.json())


app.use(session({
    name: process.env.SESS_NAME,
    resave: false,
    saveUninitialized: false,
    store: sessionStore,
    secret: process.env.SESS_SECRET,
    cookie: {
        maxAge: TWO_HOURS,
        sameSite: true,
        secure: IN_PROD
    }
}))


const redirectLogin = (req, res, next) =>{
    if(!req.session.userId){
        res.redirect('/login')
    }else{
            next()
        }
 }


 const redirectHome = (req, res, next) =>{
    if(req.session.userId){
        res.redirect('/home')
    }else{
            next()
        }
 }


app.get('/', (req, res)=>{
    const { userId } = req.session
    console.log(userId);
    res.send(`
    <h1> Welcome!</h1>
    ${userId ?`<a href = '/home'> Home </a>
    <form method='post' action='/logout'>
    <button>Logout</button>
    </form>` : `<a href = '/login'> Login </a>
    <a href = '/register'> Register </a>
`}
    `)
})


app.get('/home', redirectLogin, async(req,res)=>{
    const {userId} =req.session
     if(userId){
    try{
        const user = await db.getUser(userId);
        console.log(user)
        req.user = user;
        res.send(`
        <h1>Home</h1>
        <a href='/'>Main</a>
        <ul>
        <li> Name: ${user[0].first_name} </li>
        <li> Email:${user[0].email} </li>
        </ul>

        `)

    } catch(e) {
        console.log(e);
        res.sendStatus(404);
    }
}

})


app.get('/login',redirectHome, (req,res)=>{
    res.send(`
    <h1>Login</h1>
    <form method='post' action='/login'>
    <input type='email' name='email' placeholder='Email' required />
    <input type='password' name='password' placeholder='password' required/>
    <input type='submit' />
    </form>
    <a href='/register'>Register</a>
    `)
})


app.get('/register',redirectHome, (req,res)=>{
    res.send(`
    <h1>Register</h1>
    <form method='post' action='/Register'>
    <input type='text' name='firstName' placeholder='First Name' required />
    <input type='text' name='lastName' placeholder='Last Name' required />
    <input type='email' name='email' placeholder='Email' required />
    <input type='password' name='password' placeholder='password' required/>
    <input type='submit' />
    </form>
    <a href='/login'>Login</a>
    `)
})


app.post('/login',redirectHome, async(req, res, next)=>{
    try{
    const email = req.body.email;
    let password = req.body.password;
    user = await db.getUserByEmail(email);

    if(!user){
        return res.send({
            message: "Invalid email or password"
        })
    }

    const isValidPassword = compareSync(password, user.password);
    if(isValidPassword){
        user.password = undefined;
        req.session.userId = user.id
        return res.redirect('/home');
    }  else{
         res.send(
             "Invalid email or password"
        );
        return res.redirect('/login')
    }

    } catch(e){
        console.log(e);
    }
});


app.post('/register', redirectHome, async (req, res, next)=>{
    try{
        const firstName = req.body.firstName;
        const lastName = req.body.lastName;
        const email = req.body.email;
        let password = req.body.password;


              if (!firstName || !lastName || !email || !password) {
                return res.sendStatus(400);
             }

             const salt = genSaltSync(10);
             password = hashSync(password, salt);


        const user =  await db.insertUser(firstName, lastName, email, password).then(insertId=>{return db.getUser(insertId);});
        req.session.userId = user.id
            return res.redirect('/register')

    } catch(e){
        console.log(e);
        res.sendStatus(400);
    }
});


app.post('/logout', redirectLogin, (req, res)=>{
    req.session.destroy(err => {
        if(err){
            return res.redirect('/home')
        }
        sessionStore.close()
        res.clearCookie(process.env.SESS_NAME)
        res.redirect('/login')
    })

})


app.listen(PORT, ()=>{console.log(`server is listening on ${PORT}`)});
.env
APP_PORT = 3000
DB_PORT = 3306
DB_HOST = localhost
DB_USER = root
DB_PASS =  'enter your database password'
MYSQL_DB = db


SESS_LIFETIME = TWO_HOURS
NODE_ENV = 'production' /change it to development if you are in development environment
SESS_NAME = 'enter_the_session_name'
SESS_SECRET = 'yoursecret'
Main page with no existent session:

Register page:

Login page:

Home page:

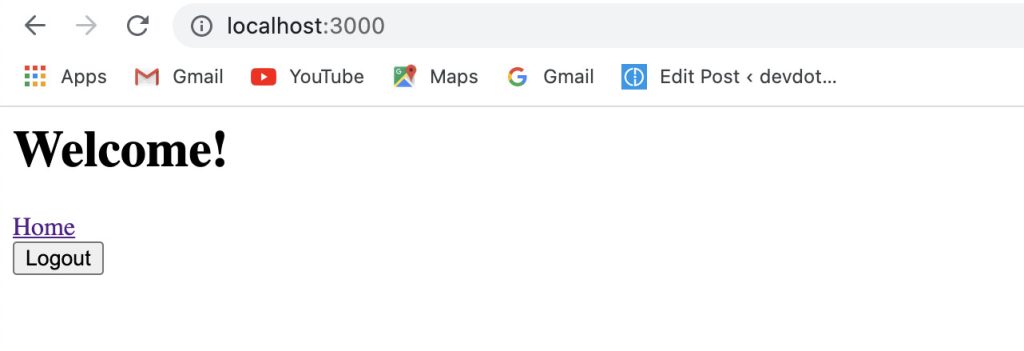
Main page with an existent session:
Conclusion
In this article, we gave you an idea of how to add a login and registration functionality to your API to create a solid authentication system for the users. Now all you have to do is combine your knowledge of SQL and the other CRUD methods to implement more functionalities for user s management. If you want to see examples of SQL requests that you can use, like update or delete, check here: MySQL queries examples in node.js.
You might also like:
Best practices for optimizing MySQL database performance.
How to add Custom Error Handler Middleware to your Node.js/Express API.
Complete JWT Authentication and Authorization System for MySQL/Node.js API.
How to interact with MySQL database using async/await promises in node.js ?
How to store Session in MySQL Database using express-mysql-session.
How to Manage Session in Nodejs using Redis Store.
Node.js + Redis – Complete API for Authentication, Registration and User Management.
Why is Connection Pooling better than Single Connection?.
How to create MySQL database using node.js.
Complete Guide to Build a RESTful API with Node.js and Express.
How to Get Current Date and Time in JavaScript.
Automating Your MySQL Database with Triggers.
How to use ON DELETE CASCADE in MySQL.
MySQL + Event Scheduler: How to delete data from MYSQL table using Event Scheduler.